I’ve owned two Yamaha FJR1300s and logged more than 100,000 combined on them. Both of those motorcycles – a 2003 and a 2008 – proved to be reliable, comfortable and fun to ride. However, there are a few nuances to owning an FJR1300 – both good and not so good – especially if you do your own motorcycle maintenance.


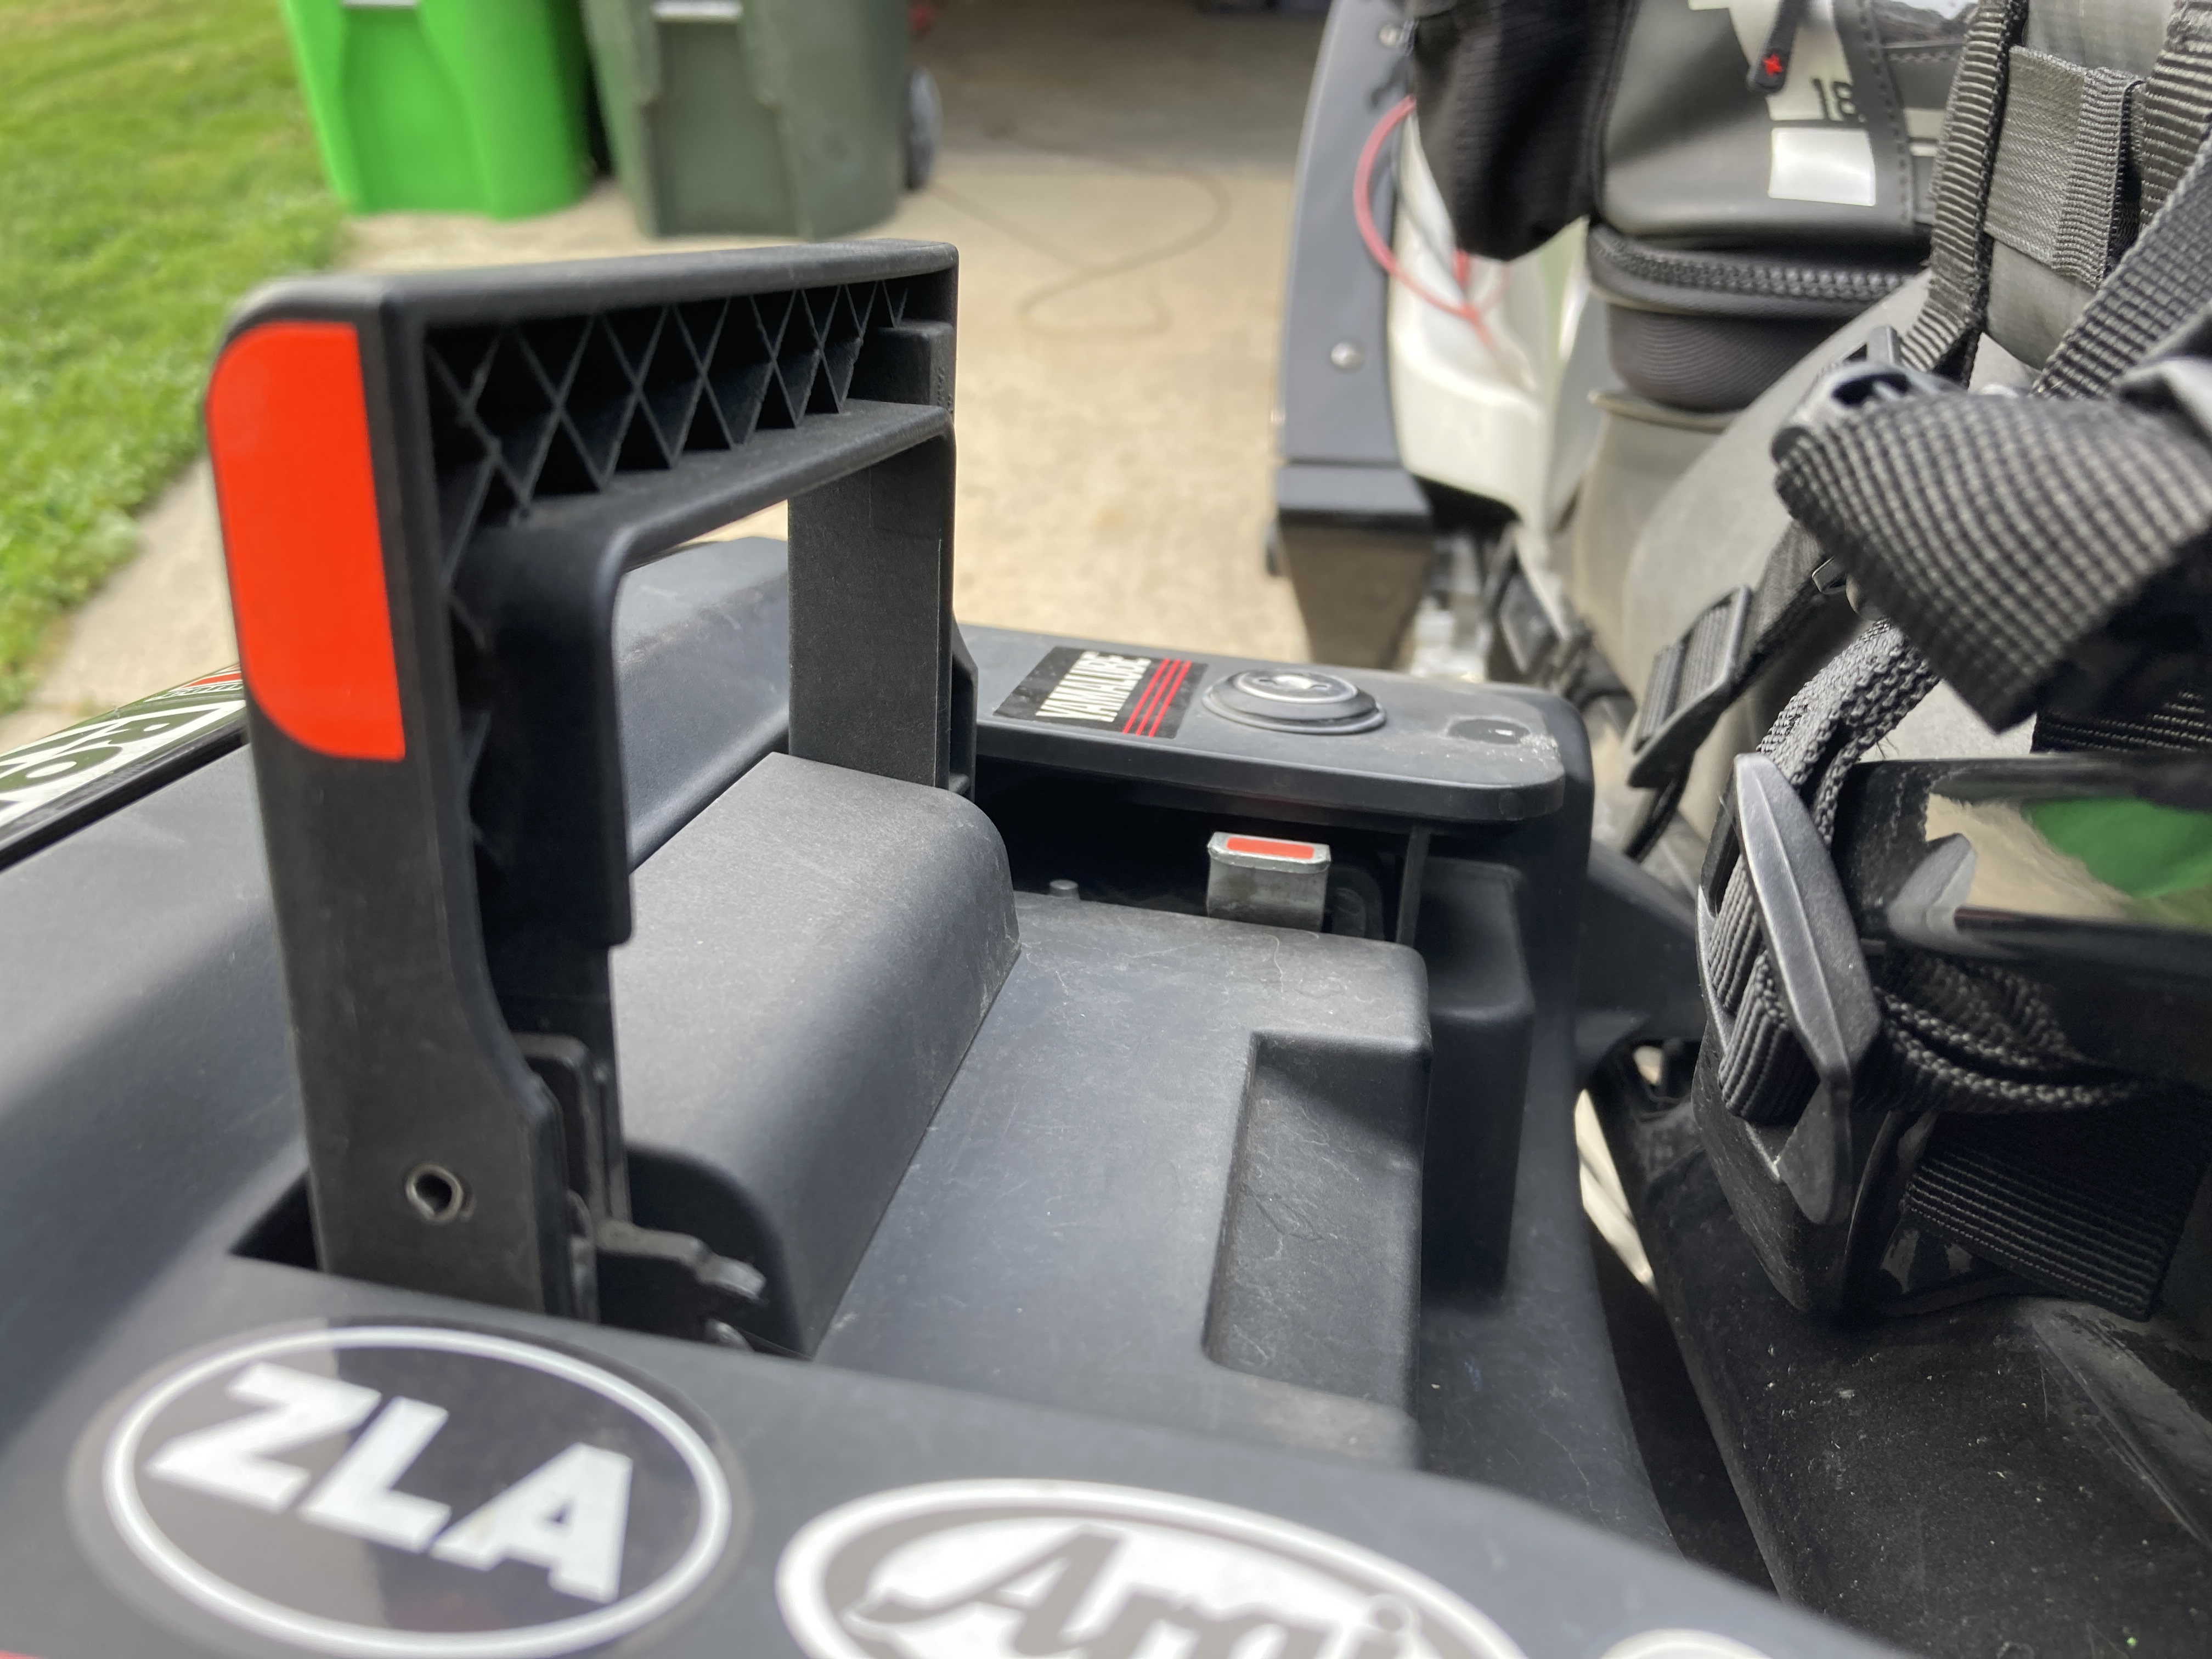
Battery location
Most other motorcycles I’ve owned have the battery space located somewhere below the rider’s seat – but not the FJR. The battery’s home is nestled within the front fairing. Yes, you read that right.
Apparently the need for a large airbox for the 1298cc inline-four engine had Yamaha engineers looking for an alternate battery location. A tall, slender 14-cell battery slides into a space located below the right-side inner fairing panel and is secured by a pair of metal brackets that are held together by a hex cap screw.
On the first-generation FJR, the inner fairing panel is one large piece on each side, and the whole of it had to be removed to access the battery. It’s not terribly difficult to remove – but it’s not the easiest task, either. The second-gen model I currently own has that inner fairing piece split into two parts. The lower, flat piece is all that needs to come out to access the battery terminals. It’s held in place by two bolts and a plastic rivet. However, it’s easier to remove and reconnect the battery if the upper (vertical) inner fairing piece is also removed.
The battery location does make it a little easier to connect some accessories to the battery, and it puts a Battery Tender “pig tail” in a higher, better location for connecting heated gear or a phone charging cable.
However, if your battery dies and you have to connect a jump pack, you’re going to have a tougher time getting the clamps connected. Or you want to run a terminal block setup, you’ll have to run relatively long lead cables to the battery
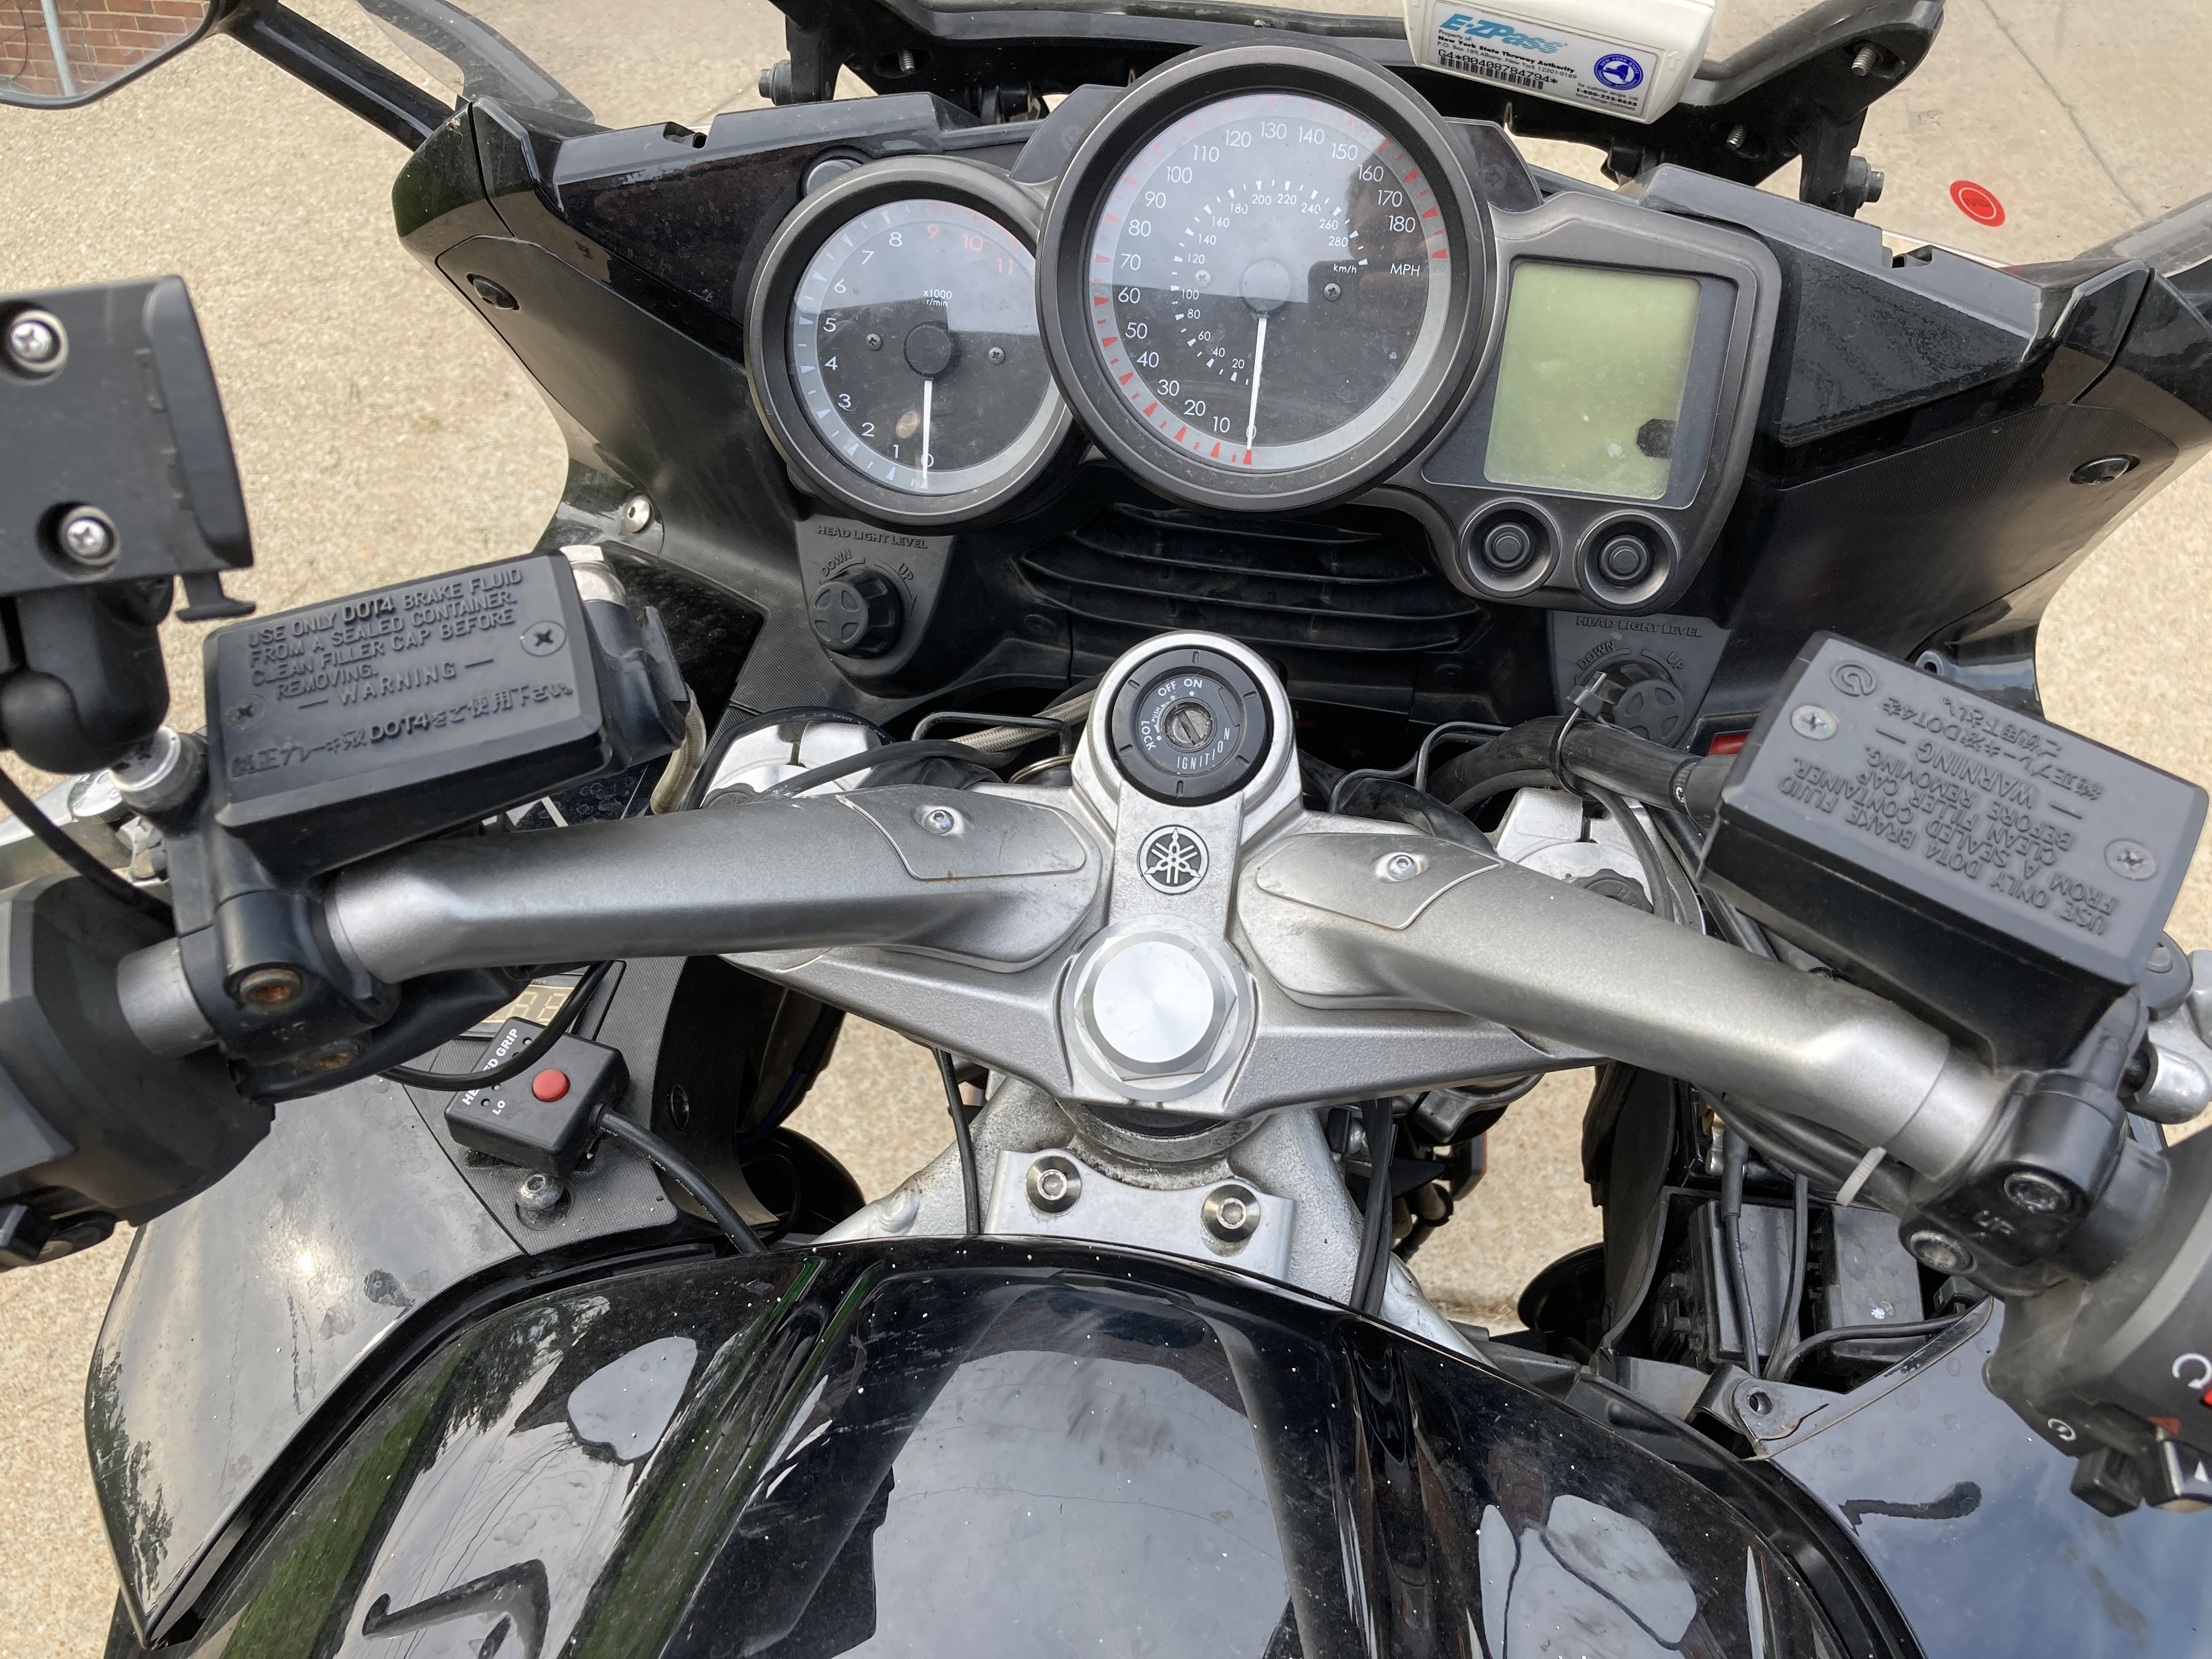

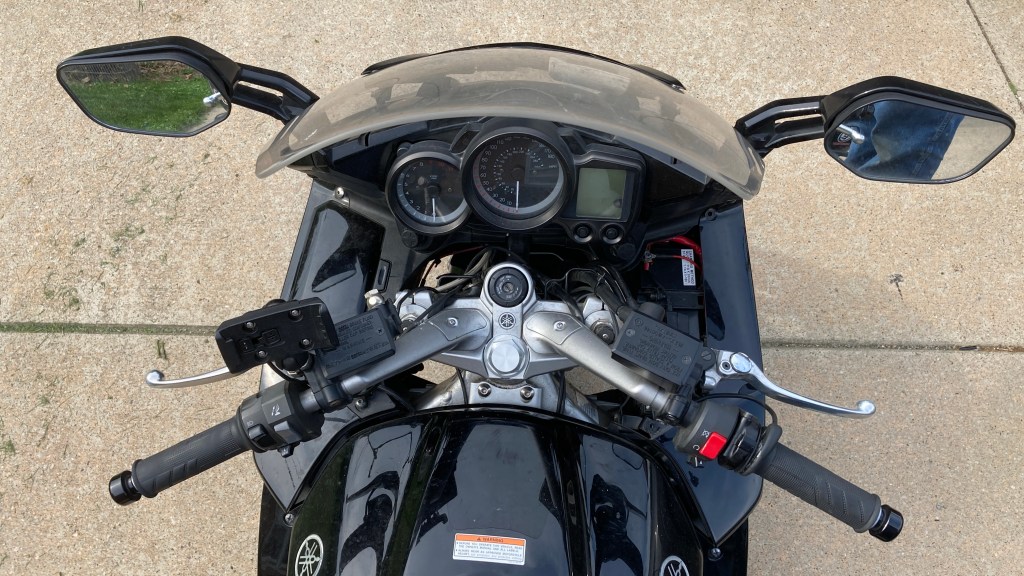
Handlebars
Many motorcycles come with tubular handlebars that have to be replaced if the rider would like to change their to reach to the grips. The FJR comes equipped with adjustable handlebar “towers” that have pros on cons.
The first-generation FJR has two handlebar positions that the towers can be installed in. The farther of the two positions puts the bars an inch or two farther forward and farther apart. The second-gen has three possible positions – though the bars only move an inch or so closer to or away from the rider at the same width. Adjusting either set is relatively easy and requires simple hand tools.
Though easy handlebar adjustability is a nice feature, I dislike the setup because of how much more difficult it makes mounting some accessories. Some such accessories – heated grip controls, voltmeters, GPS mounts and electrical switches — come with clamps to be mounted to ⅞-inch or 1-inch tubular handlebars. The lack of traditional handlebars on the FJR means resorting to Velcro on the inner fairing pieces or something similar to mount such accessories.
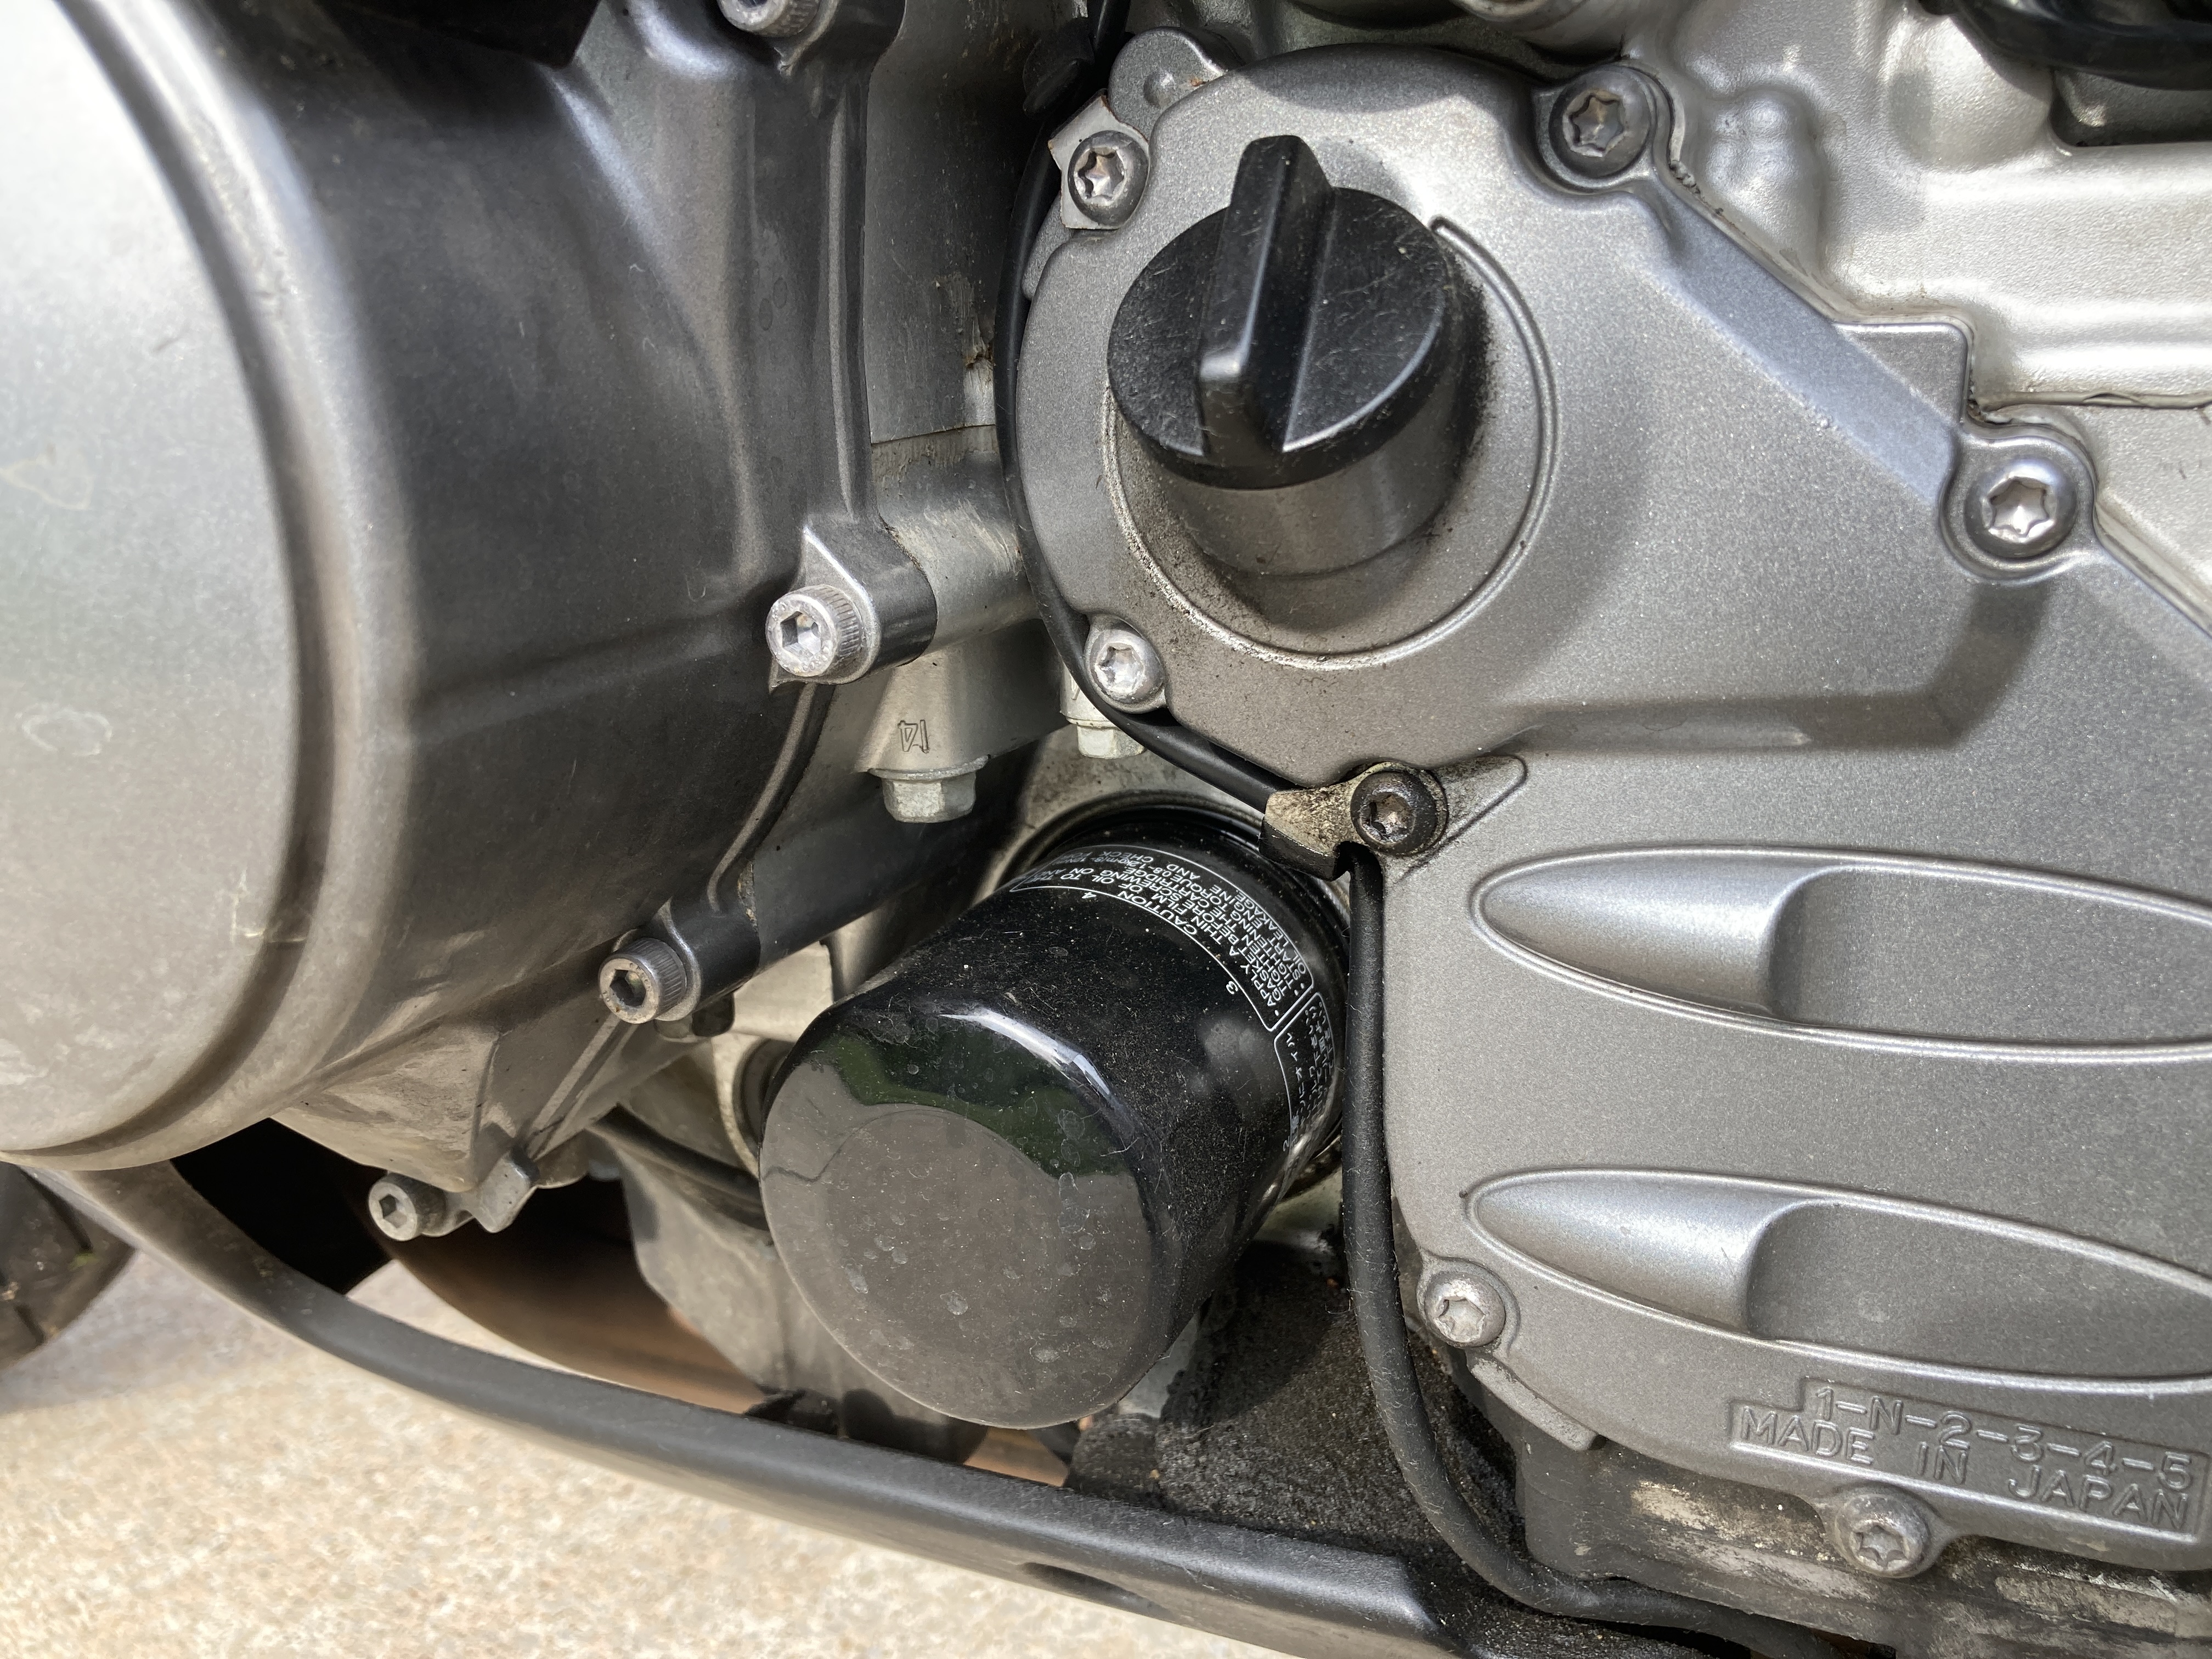

Oil Filter Location
Of all the FJR1300’s quirks, this one is by far the best. Unlike many inline-four cylinder engines that have the oil filter mounted on the front of the block behind the exhaust header – and often beneath the lower fairing – the FJR’s oil filter is located on the lower left side of the engine.
I applaud Yamaha engineers for keeping touring riders – and their need to change oil more often due to logging lots of miles – in mind when they incorporated the oil filter location into the design. From looking at the engine block, it appears that the potential original oil filter location for the Yamaha YZF-R1-inspired engine design has been repurposed as an oil cooler.
The slight downside of the oil filter location is that some of the oil that spills out when you spin off a used filter soaks into some of the foam padding on the lower fairing – leading to that wonderful smell of burning oil for a little while after an oil change. However, not having to take off the lower fairing or having a very limited approach to get to the filter behind an exhaust header more than makes up for the occasional and short-lived burning oil odor.

Front Tire Wear
Ask any FJR1300 owner if their front tires end up wearing unusually, and you’re guaranteed to get a somber, “Yes, yes they do.” Though some tire manufacturers – such as Bridgestone, Michelin and Metzeler – have developed sport touring tires with additional carcass reinforcement for heavy machines such as the Yamaha FJR1300, there doesn’t appear to be a true remedy to the bike’s weight causing cupping, feathering or scalloping on the front tire.
Most sportbikes and sport touring motorcycles call for 36 psi in the front tire and 42 psi in the rear tire for best mileage. The 42 psi holds true for the FJR’s rear tire, but the second-generation owner’s manual calls for 39 psi in the front tire. The first-gen manual wanted 33 psi in the front, but try running that and you’ll be bound for a bumpy, unnerving riding experience in short order.
Other riders have told me about what they’ve tried to address the issue, including heavier fork oil, running 42 psi in the front tire and stiffer fork springs. But so far, I haven’t heard of a sure-fire way of maintaining normal wear on the front rubber.

Rear Suspension Linkage Maintenance
This one is an absolute pain, but ignoring it can have dire consequences. The FJR1300’s rear suspension linkage – the triangle piece that connects the rear shock and swingarm brackets to the bike’s frame – has several needle bearings that are known to fail. My understanding is the double bearings for the swingarm brackets don’t fail too often, but the single ones for the rear shock and the frame connection aren’t packed with much grease from the factory and are known to seize up.
If one or both do stop working, the lack of movement at the bearing as the motorcycle goes over bumps transfers that stress to the swingarm brackets – which eventually snap and cause the rear suspension to collapse. You can find photos pretty easily on Google of an FJR’s subframe sitting on the rear tire on the side of the road.
Replacing the bearings isn’t terribly difficult once you have the linkage removed – but getting the linkage off requires removing the centerstand. That can be a real chore, especially if you haven’t had to do it before and the front centerstand bolts were installed with the bolt head facing the exhaust downpipes on either side. The common solution is to cut the heads off the front centerstand bolts and install new ones with the bolts being installed facing outwards (toward the exhaust pipes) instead of toward the centerline of the bike. Otherwise you have to remove the exhaust system to get them off.
You’ll also need a way to hold your FJR in place while the centerstand is off. My solution is to put the front wheel in a wheel chock and lift the back of the motorcycle from the front of the subframe using ratchet straps and a stand made of black water pipe. Such a stand also is useful when doing front tire changes for lifting the front of the bike while it’s on the centerstand to remove the front wheel.
I make it a point to remove, check and re-grease the suspension linkage each winter.


Luggage Locks
The FJR1300’s OEM luggage locks work fine for the most part – but the little screws that hold the locking plate to the key cylinder are prone to coming loose.
I figured this out the hard way when I was at a breakfast ride. I inserted my key into my top case lock, and as I turned it the entire cylinder turned with the key and came out of the cylinder bore when I tried to withdraw the key. I later discovered the two security bit-driven screws had come completely out. Thankfully the locking plate was still there. I found some replacement hex bolts (size M3 I believe) was able to quickly and inexpensively fix the problem myself. Shortly after I bought my second-gen FJR1300 I found the bolts on its saddlebags had started to come loose.
My solution to the issue was to use a drop of blue threadlocker on the small, very short bolts. I still check them every now and again, but none of the bolts I treated with threadlocker have come loose to date.

Front Fork Mid Bushing
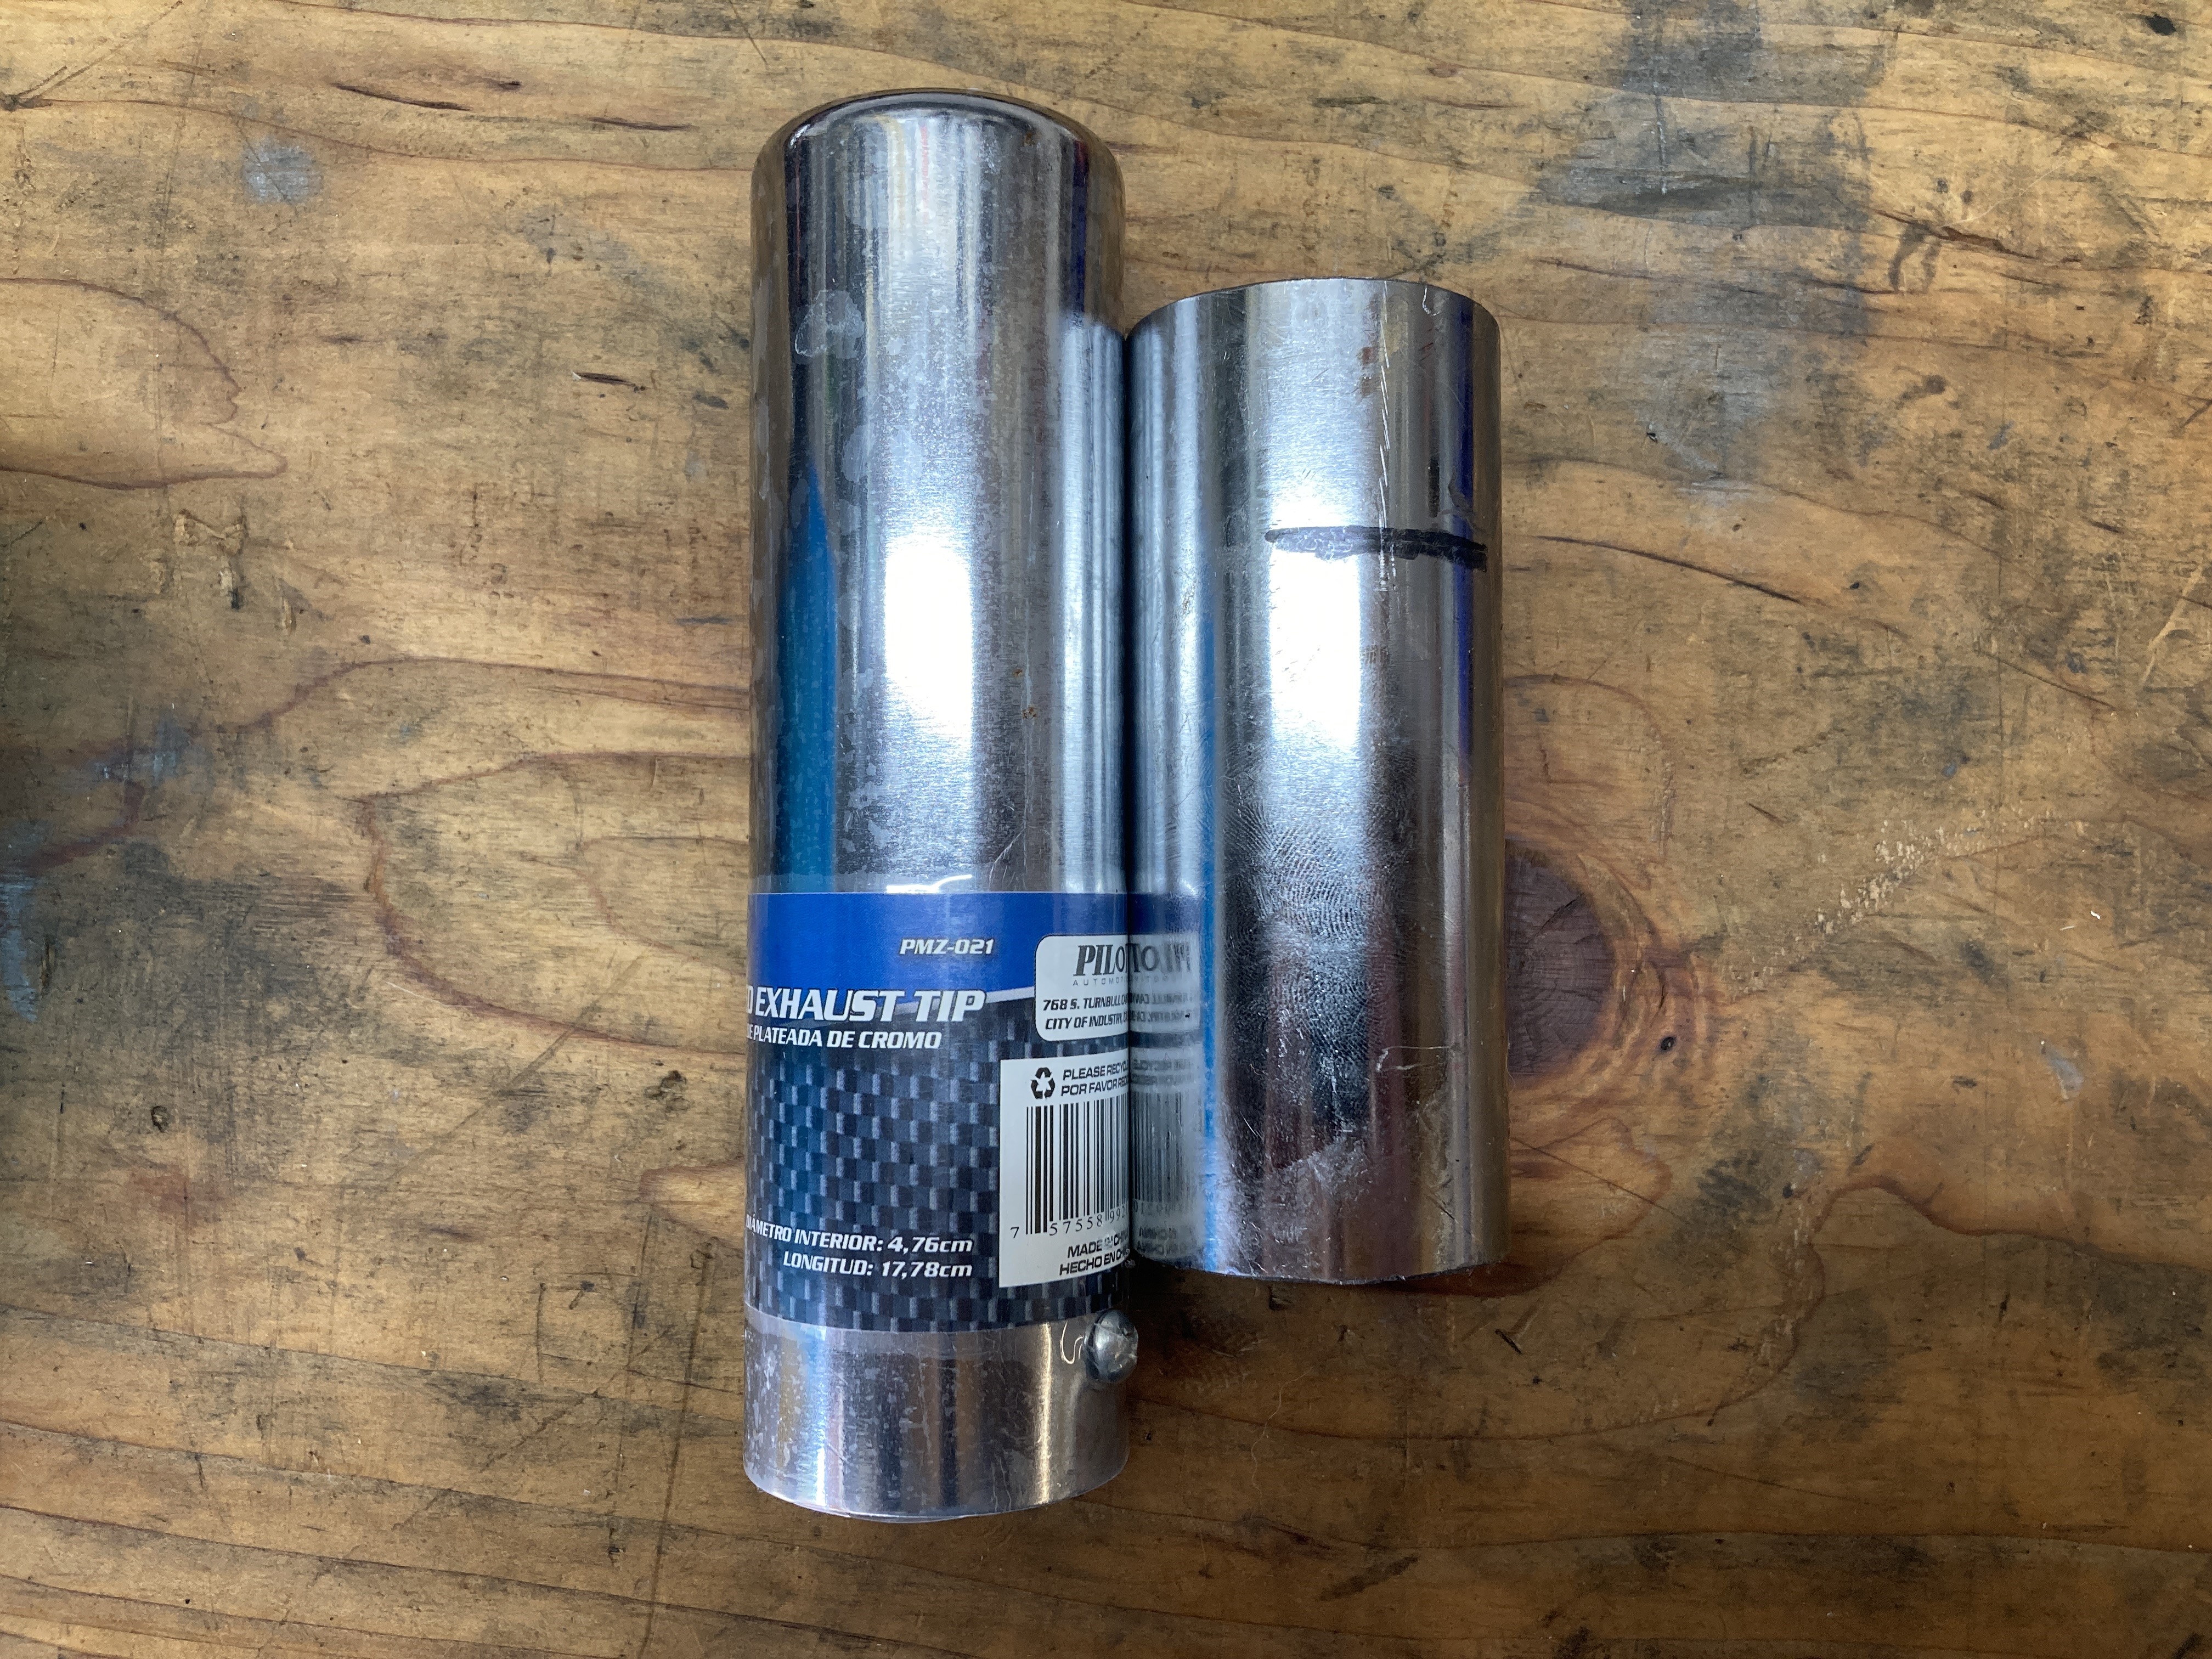
Though rebuilding front forks is usually a moderately difficult task, the second-general FJR1300’s mid-bushings adds another layer of complexity to the task. And, as far as I know, the only suitable tool for the job is a cheap, thin-walled automotive exhaust tip you have to cut the ends off of to turn it into a fork seal driver extender.
The story I’ve heard is that Yamaha added the mid-bushing to the second generation FJR1300’s front forks due to issues with fork tubes flexing under heavy braking. The mid-bushings – which are located several inches below the upper bushings near the top of the lower fork tube – is intended to help reinforce the inner fork tubes when a rider brakes aggressively.
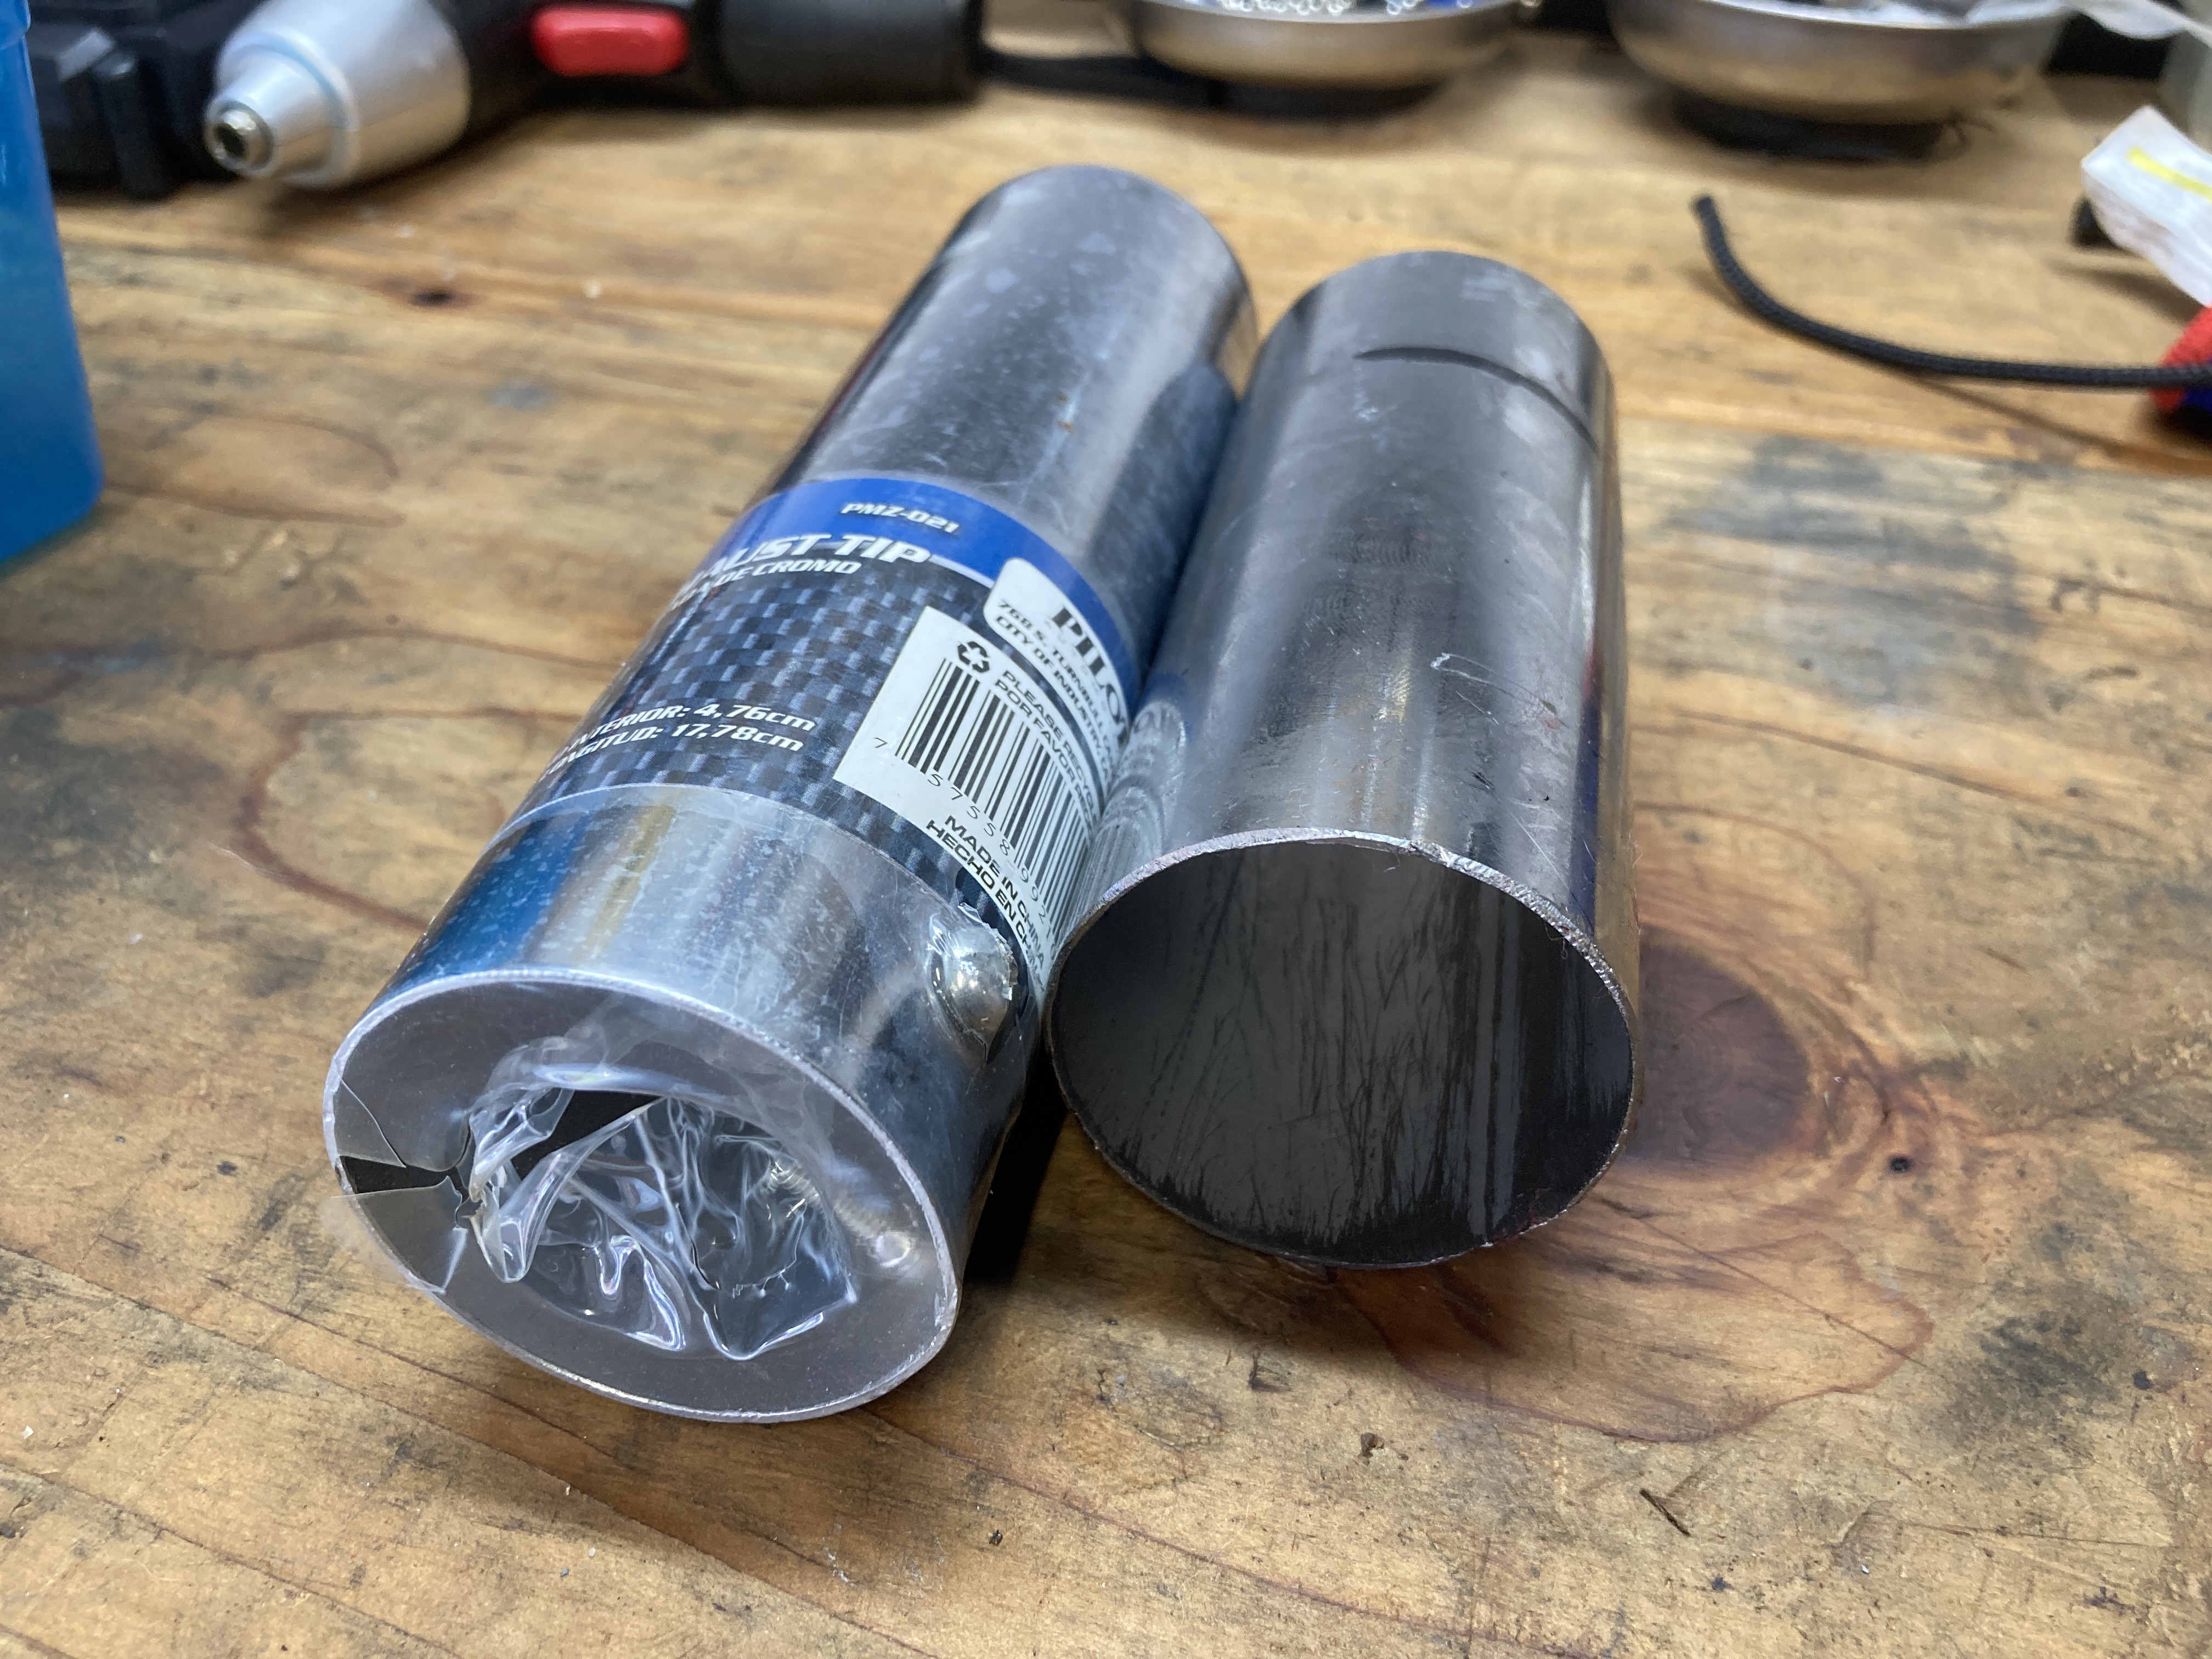
I’ve read that you can simply not replace the mid-bushings when you do a fork rebuild. But, if you want to replace them, you need something to drive the bushings down into their recesses inside the out fork tube. The only “tool” I’ve found that fits around the outside of the inner fork tube and the inside of the outer fork tube is a car exhaust tip (part number PMZ-021). Once the curled end on one side and the screw hole on the other end have been cut off, the tip is the perfect length for driving the bushing down. Be advised through, the metal the tip is made out of isn’t very strong and the end being hit by the driver can start to deform. It will have to be sanded after a few uses to keep the end from becoming too thick to fit in the narrow opening.


Leave a comment